The house we're renting at the moment has a very poorly lit en suite. It's served by two tiny energy saving bulbs which take far too long to warm up, and they're set so far back from the mirror that the only thing you can ever see is your silhouette.
Ikea hack to the rescue!
The idea was to use a picture frame, hanging from the top edge of the mirror, and filled with LEDs. This would put the light where it needs to be, be easily adjusted or removed, and allow for the wiring to be tucked behind the mirror's edge.
I used a 30x40cm picture frame from Ikea called "
Mossebo". I chose this one specifically because it allowed you to have the picture close or far from the glass. This gives the frame the depth required to contain the LED lights.
I really wanted to use the colour adjustable Dioder light set so i could simulate different kinds of lighting warmth (apparently this is important). Unfortunately that version of the light can't manage the warm white of the plain Dioder, which is the most important tone! So i saved ten bucks and went with the
fixed light Dioder set instead. Maybe a dual-light setup in the future could address this?
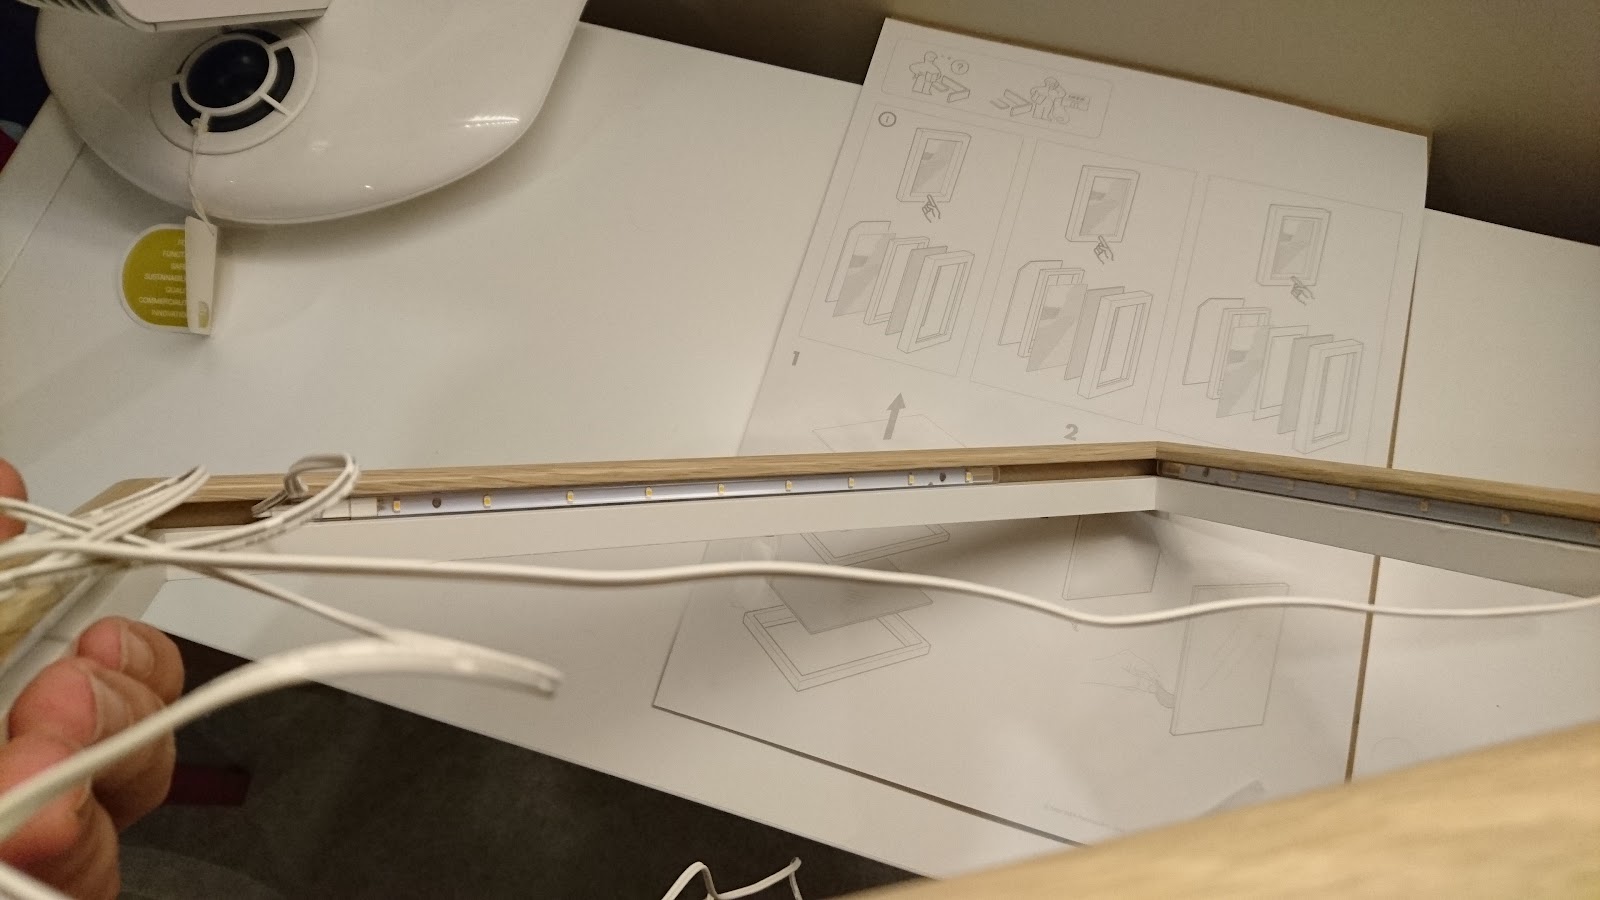
There were two ways to fix the lights. Forward facing is the most traditional and throws out the most light, but it would make the frame bulkier. Side firing lights would look sleeker, but would sacrifice functionality. I had to test the output.
Thankfully, enough light is reflected off of the mirror to provide good illumination, the side firing setup is the winner!
Discarding the transparent, card sheet, and backing layers of the Mossebo left me with the frame, the cardboard spacer, and enough of a cavity to just fit the Dioder strips!
Then it was just a matter of extending the daisy-chain connectors slightly to evenly space the lights with just one power wire out. I used some of the ample spare wire, my soldering iron, and some tiny heat-shrink tubing i had lying around.
Next i removed some material from one corner of the frame spacer to allow room for the power wire, and a groove to the centre top.
A couple of staples into the wooden frame are more than enough to allow the wire to take the weight. On my first try i used a staple gun, and ended up crushing the wire with the staples! These wires are pretty soft, but a second go with an office stapler worked a charm. Go softly, but remember there's three spare lengths of wire!
To hang the frame from the mirror, i ended up utilising one of the metal clips which came with the Dioder. I cut the plug off the base-end of the power wire and fed it through the centre hole with the intention of tying a knot on the other side, but simply tucking the wire under provided more than enough friction to hold it.
The last part was to simply tuck the remaining wire behind the edge of the mirror top, then down the gap along the wall to the power socket.
To save a lot of unnecessary wiring, i cut the plug off the power adapter and joined it directly to the power wire from the frame (AFTER feeding it through the hanging clip!). This bypasses the 4-way adapter box and the thicker run of wire with the in-line switch. It's FAR tidier now.
I'm looking at adding strips of white semi-transparent plastic to the inner edges of the frame, to blur the light a little and to totally hide the LED recess when not in use. I might also spray the wire silver to hide the markings on it (although it's barely noticeable unless you're looking for it).


No comments:
Post a Comment