Showing posts with label Design. Show all posts
Showing posts with label Design. Show all posts
Wednesday, 20 November 2019
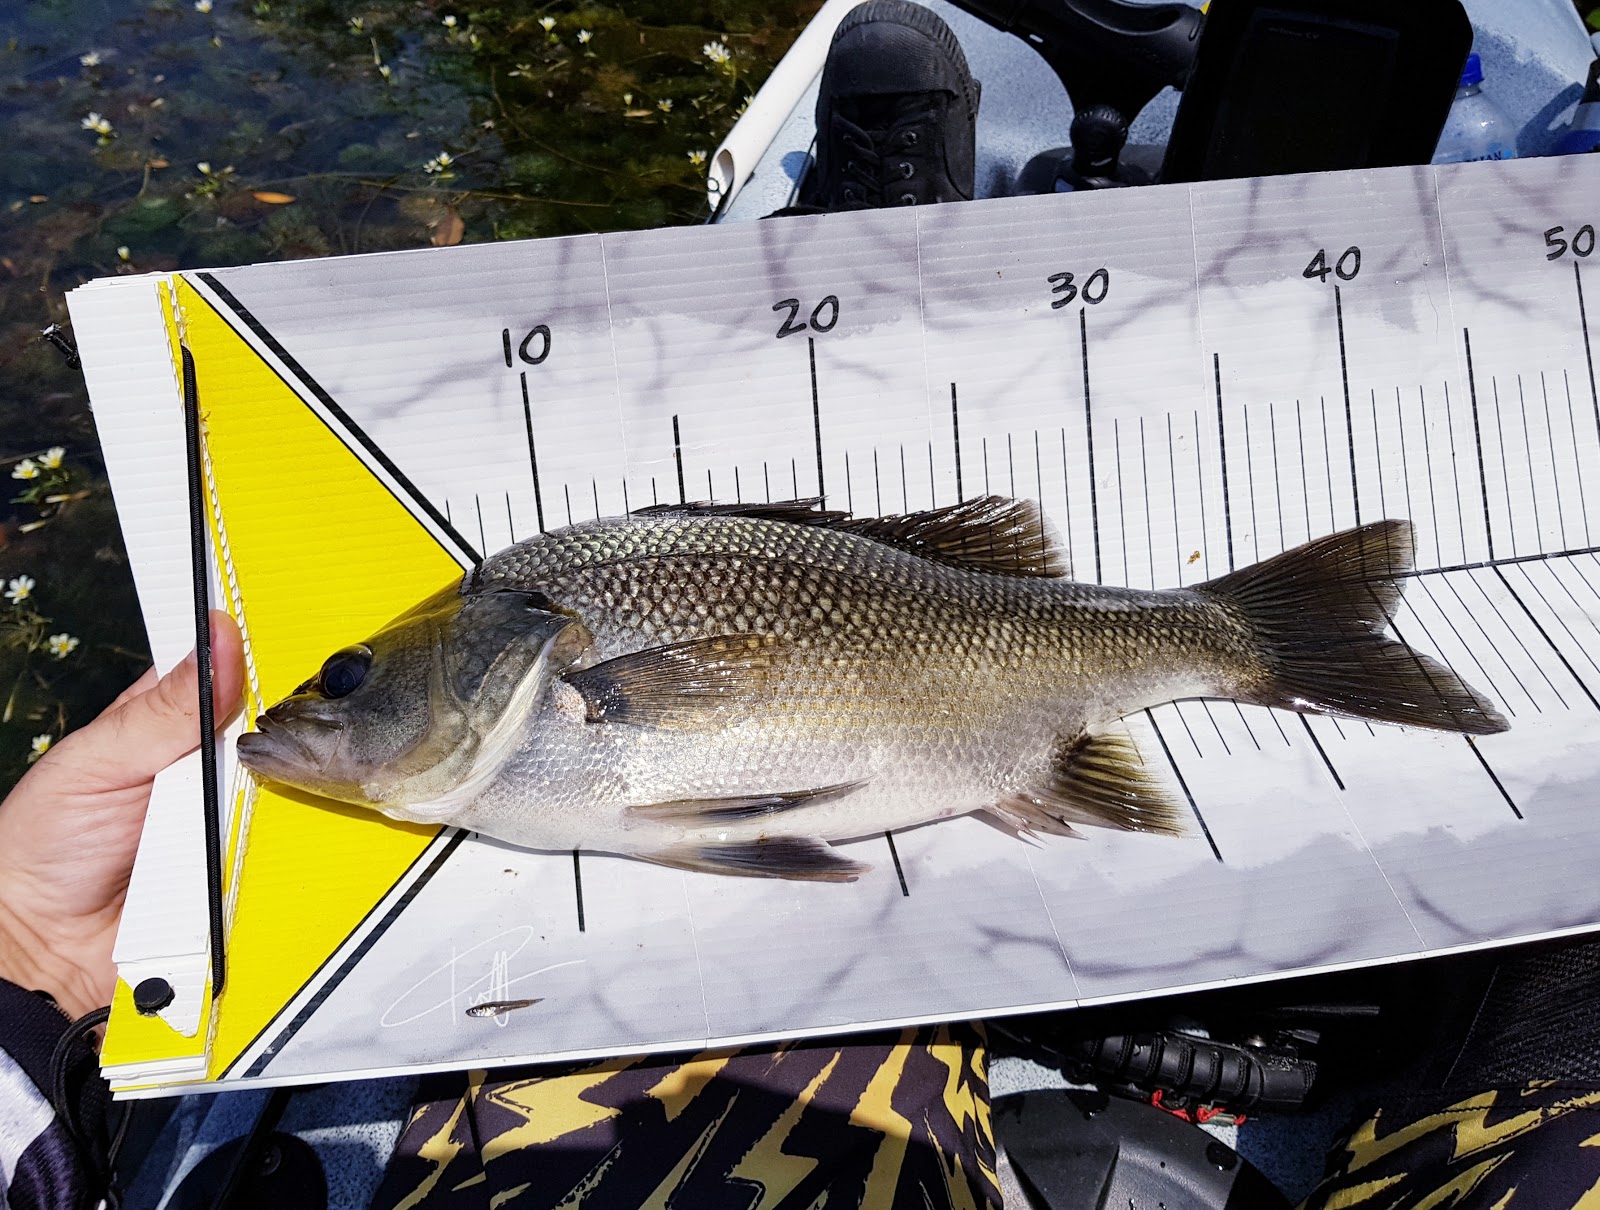
The “Brag Yak”: A rigid, rollable, fish measuring mat
Having struggled for years with using traditional floppy vinyl “brag mats” to measure my fish while out kayaking, i started looking for a reasonable alternative. The goal was to buy something which could provide a solid, flat measuring surface, but which didn’t take up mountains of room when not in use. Nothing existed... until now.


How to make a proper Neo Geo Mini
The Neo Geo is one of my favourite consoles, stocked with games which pushed the limits of pixel art so far that they’ve stood the test of time. In their prime they were basically the Disney of pixels, and that expensive workflow is reflected in how far beyond the reach of the most modern indie studios their games still are in terms of animation.

Friday, 4 August 2017
The Flat-Stick - Full build with the basic Pika case
One of my earliest commissions is this Tekken-themed stick. The customer had a tight budget, but for the same price as the sub-par Venom stick he ended up with a full suite of Sanwa hardware, double-sided art, and a very solid little PC/PS3/PS4 (legacy) stick!


Friday, 21 July 2017
The Flat-Stick - Assembling the Sanwa JLF Joystick
When i ship a fully-built stick, i tend to take the shaft out of the stick to protect it in transit. It only takes a couple of minutes to reassemble with no tools required, and it's far less work than the alternative of installing the entire unit.
These are the parts required to put it together.

These are the parts required to put it together.

Friday, 14 July 2017
The Flat-Stick - Laser-etched button inserts
I was popping some buttons apart recently and noticed that the Seimitsu PS-14-K has an enormous internal capacity, enough to possibly fit a small circle of plywood inside!
So with the latest run of laser-cut parts, i threw in some button inserts.

So with the latest run of laser-cut parts, i threw in some button inserts.

Tuesday, 27 June 2017
The Flat-Stick - Painting, and introducing the "Bigly" 400x300 stick
Bamboo plywood has many redeeming qualities; It's cheap, strong, looks good, and cuts really well. But it's literally impossible to sand, so painting it can be tricky.
If you just blow a bit of paint over the untouched wood you get quite visible grain. This can be used to good effect, and in flat black it tends to look like burnt wood. It helps that the pieces are all cut with respect to the visible grain, with the top panels having vertical grain and the side pieces horizontal.

Tuesday, 20 June 2017
Flat-Pack Fightstick - An affordable pre-cut kit which makes a kickass controller!
With Mad Catz going out of business, the lack of retail arcade sticks in Australia can only get worse. The cheapest option is still the PS4 Venom from JB HiFi; a gross, cheaply equipped stick which still carries a $200 asking price. For Xbox owners, the situation is even more dire.

I've posted a few how-to guides covering the DIY building of a cheaper, more solid case, but the power tools required still put it beyond the reach of many people. So finally, here's a mailable case which legitimately takes five minutes to assemble, requires absolutely no tools, and looks better than ever.

Friday, 14 October 2016
Ikea Arcade Stick - Mini Edition Teaser!
I've had a few requests to compile a proper step-by-step build of one of my sticks, as the previous posts have all been iterative updates. Here's a quick rundown of what's gone on so far...

Wednesday, 5 October 2016
Ikea Arcade Stick V2 - Shiny Shiny!
Continued from Part Two.
When it comes to art, I am the most indecisive human alive. This is why I've never had a tattoo, despite spending the best part of a decade drunk.

So the styrene sheet goes down over the naked plywood for now. It will protect the surface while I decide what to do, and it still looks nice enough.
When it comes to art, I am the most indecisive human alive. This is why I've never had a tattoo, despite spending the best part of a decade drunk.

So the styrene sheet goes down over the naked plywood for now. It will protect the surface while I decide what to do, and it still looks nice enough.
Monday, 3 October 2016
Ikea Arcade Stick V2 - Part Two
Continued from Part One.
Much has happened since last we spoke! My new hardware order from Arcade Shock took a little longer than anticipated, but work was swiftly resumed on the other side!

Much has happened since last we spoke! My new hardware order from Arcade Shock took a little longer than anticipated, but work was swiftly resumed on the other side!

Wednesday, 7 September 2016
Prototyping - Wii U wheel with pedals and shifter
To make my Wii U Zapper work from the Wii U Gamepad, i had to create an interface board to connect the PCB to my external switches. This modularity allowed me to hook the gamepad up to just about anything, and one of the first ideas i had was to take on the arcade version of Mario Kart.
Saturday, 6 August 2016
Ikea Arcade Stick V2 - The Stromby Twins
The Ribba stick is finished, and it's been getting loads of play time, but I've already had some new ideas kicking around my head.


Tuesday, 19 July 2016
Fighting Frame - Finale!
My new donor PCB's arrived care of eBay, and they're exactly as cheaply made as you'd expect of knockoffs. In comparison, the official CCP is a thing of beauty.

Friday, 15 July 2016
Fighting Frame - Part Two
Since the previous entry i've decided to optimise the build slightly, shedding the two separate wiimote bulkheads by integrating them into the front and back "wall" sections. Two fewer pieces, much improved!

Thursday, 14 July 2016
Fighting Frame - Part One
With the Lucario Fight Stick finished, it's time to move on to my "Player 2" build (for lots of Virtual Console co-op fun!). I was considering going with another intensive Pokken character build, but i wanted more time to think about the next case style for that.
But, as a gift to "the people", i've decided to try my hand at a cheap, easy to build stick which uses Ikea parts to present a high quality finish without the usual skill requirement. It features replaceable art, has no visible screws, requires only the most basic of tools, and all it takes is a sheet of 7mm plywood and a picture frame! Total cost of materials was about $15.

But, as a gift to "the people", i've decided to try my hand at a cheap, easy to build stick which uses Ikea parts to present a high quality finish without the usual skill requirement. It features replaceable art, has no visible screws, requires only the most basic of tools, and all it takes is a sheet of 7mm plywood and a picture frame! Total cost of materials was about $15.

Tuesday, 14 June 2016

Tuesday, 24 May 2016
Wii U Fight Stick - Part 6
Continued from Part 5
Yesterday I blew my nose and the result looked like an electric blue Rorschach test. The lesson here is to always wear a mask when using spray paint!
I didn't make the same mistake with the black.

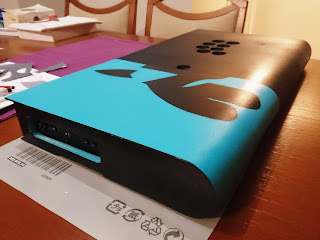
Yesterday I blew my nose and the result looked like an electric blue Rorschach test. The lesson here is to always wear a mask when using spray paint!
I didn't make the same mistake with the black.


Friday, 20 May 2016
Wii U Fight Stick - Part 5
Continued from Part 4
Sorry for the lack of progress here, i've just returned from my brother's overseas wedding in Bali! It took a couple of weeks out of my build time to reorganise things at work to accommodate, but now we're back on track.
While i worked on some techniques for laying down the paint layers, i took time to create the slot for the wiimote and fit the newly required extra three buttons (+, -, and home).
The 24mm buttons are on the right side, out of harms way. The holes are cut and the wiring is finished, but my order of Seimitsu PS-14-DN-K's is still en route from the UK (faster, cheaper than from the US). They'll be great.

Tuesday, 26 April 2016
Wii U Fight Stick - Part 4
Continued from Part 3
After a solid day of curing, it was finally time to take the wraps off the case.

After a solid day of curing, it was finally time to take the wraps off the case.

Sunday, 24 April 2016
Wii U Fight Stick - Part 3
Continued from Part 2
The very literal "make or break" part of this project was always going to be in curving the plywood skin over the skeleton. A 50mm curve is pretty tight for 3mm ply, and the risk of splitting is very real. But after an overnight soak in the bath tub, and fifteen minutes of slowly forming the bend, i managed to get it tight against the ribs and clamped down.

Subscribe to:
Posts (Atom)